How to install gnomon
[Mac and Linux] Install gnomon using conda
Prerequisite: Install Conda
Make sure you have
condainstalled on your system. To check, simply open a new terminal window and type:
conda
If
condais installed, you should get a long return value describing how to use the command, otherwise you will get acommand not foundmessage.If
condais not installed, we recommend that you install Miniconda by picking the latest installer suitable for your system.
About Conda and Miniconda
Conda is an open source package management system and environment management system that runs on Windows, macOS and Linux. Conda quickly installs, runs and updates packages and their dependencies. Conda easily creates, saves, loads and switches between environments on your local computer. Find out more on the official documentation
Miniconda is a free minimal installer for conda. It is a small, bootstrap version of Anaconda that includes only conda, Python, the packages they depend on, and a small number of other useful packages, including pip, zlib and a few others.
Install Gnomon
Warning
Installing gnomon requires around 6 GB of free disk space.
Step 1: (Optional) Install Mamba in your
(base)environment
conda install -n base -c conda-forge mamba
Step 2: Create a conda environment with the right python version. Then activate this environment
conda create -n gnomon python=3.9

conda activate gnomon
For Mac M1, you need to tell conda to use x86 architecture like this:
CONDA_SUBDIR=osx-64 conda create -n gnomon python=3.9
conda activate gnomon
conda config --env --set subdir osx-64
Step 3: Install gnomon and its dependencies
mamba install -c dtk-forge6 -c gnomon -c mosaic -c morpheme -c conda-forge gnomon
Note
At this stage the gnomon application is installed but it is “empty” since no plugins are installed by default. To actually make it usable, you will have to install plugin packages
Step 4: Install plugin packages for gnomon for instance:
gnomon-utils package install gnomon_package_tissueimagemesh
or alternatively:
mamba install -c gnomon -c dtk-forge6 -c conda-forge -c mosaic -c morpheme gnomon_package_tissueimagemesh
Step 5: Congrats, you can now launch the application
gnomon
Update gnomon
Step 1: Activate your
(gnomon)environment
conda activate gnomon
Step 2: Update gnomon and its dependencies
gnomon-utils package update
or alternatively:
mamba update -c dtk-forge6 -c gnomon -c mosaic -c morpheme -c conda-forge gnomon
Finding existing plugin packages
You can find available packages by running the following command in your environment
gnomon-utils package search
[Windows] Install with Windows Subsystem for Linux (WSL)
Sources used for these instructions are:
VcXsrv sur SourceForge.
1. Install the following dependencies
VcXsrv, avalable on Source Forge.
2. Configure WSL
A $DISPLAY variable has to be defined to choose on which screen/computer to display. To configure it do this:
\> export DISPLAY=$(route.exe print | grep 0.0.0.0 | head -1 | awk '{print $4}'):0
Now, if you print $DISPLAY, you should see an IP followed by :0 such as:
> \> echo $DISPLAY
>
> \> 131.254.160.46:0
This IP is not constant and as to be set at each start of the WSL. You can tune your ~/.bashrc to set this variable at each WSL startup is you want.
Install awk is needed (for example on debian based distributions: sudo apt install awk ).
3. Configure X
VcXsrv
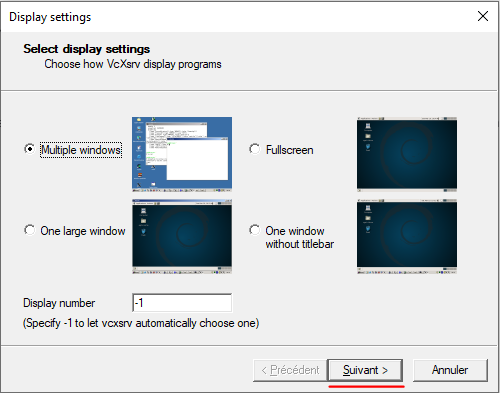
Once installed, launch XLauch and select options as shown below :
Select display setting for windows. Then click Next.
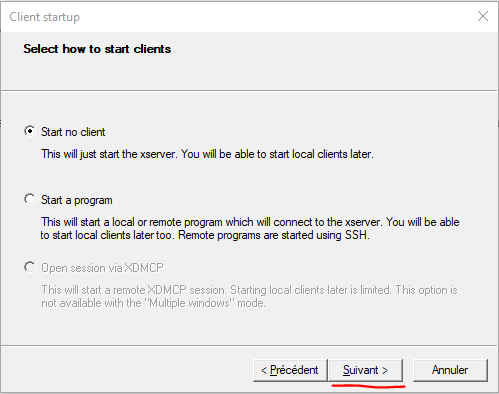
Clic on Next
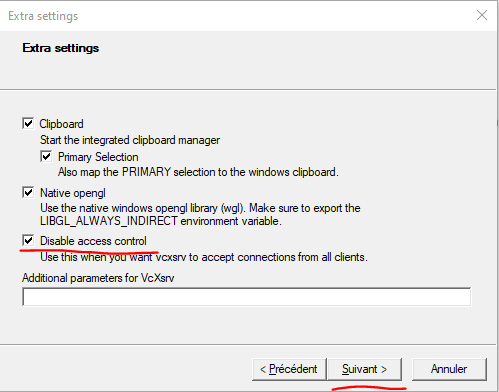
Tick
Disable access control(Note: When it’s ticked, the X server VcXsrv is open to extern connections.). Clic on Next.
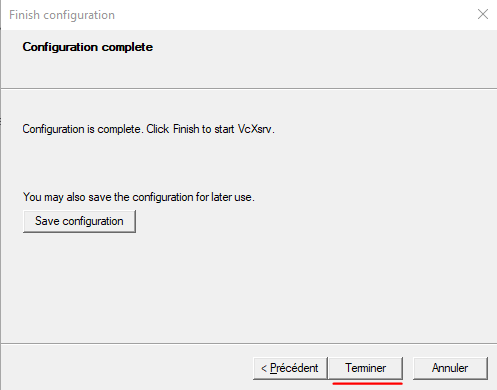
Clic on
Finish.
Putty & SSH
Start SSH service on WSL :
> \> sudo service ssh start
On WSL, type the command ip addr show eth0 and note the IP address. This step should be done at each start of WSL.
Launch Putty and configure the following parameters before connecting to WSL:
Type the IP you just noted
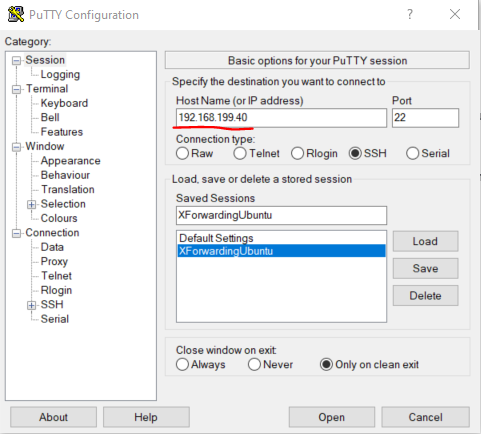
In the Menu
SSH > X11, tickEnable X11 Forwarding.
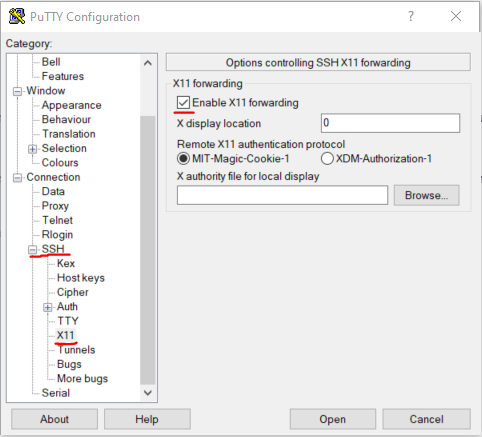
You can now start the session.
4. Launch gnomon
You can now launch gnomon through the WSL console:
gnomon